| ||
|
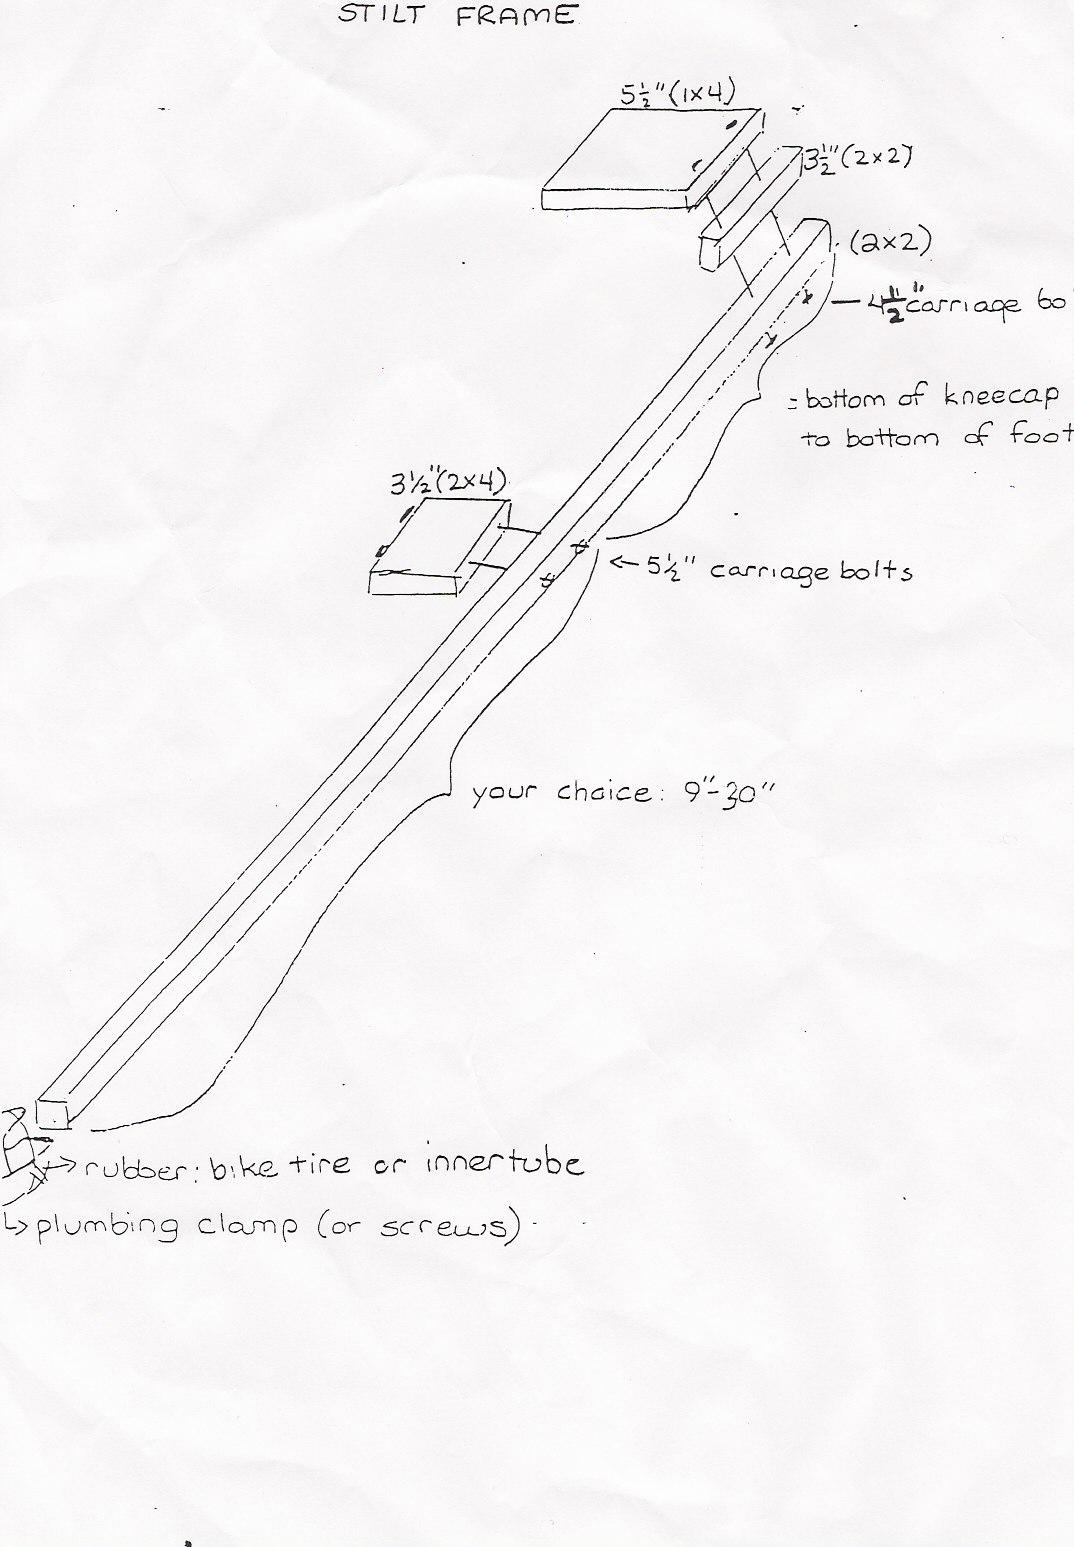
Below are some tips on various portions of the stilt and a basic diagram showing how the pieces of wood are put together with bolts and nuts. Remember to add a piece of rubber to the bottom. Padding: Commonly placed around on the knee piece, following the wood around the leg, it is not required if the stilter will be wearing knee pads. If you put padding on the stilt, remember to make sure that it covers all the wood so that the leg does not end up rubbing against any portion of it. Typically, the padding is taped on and sometimes covered with cloth, though the cloth is for aesthetics. I would recommend using the padding used for rugs as it is tough and thin, allowing the stilter to have a good pad and yet not have the padding be cumbersome Wood: A hard wood is required, with as few knots as possible. Knots make the wood weaker and especially where you are using such a thin section of wood to support the stilter's weight, you want to make sure the wood is as strong as possible. Be particularly aware of knots or other possible sources of weakness when choosing where to attach the foot and knee pieces.
Clarifications for the diagram:
The bottom of the foot is with the shoe on.
If you have any questions, please contact Peter Jehlen at peter_jehlen@openaircircus.org. |
|